 When I was a little kid we had this old broken guitar, it was some kind of student model electric department store guitar that was very likely made in Japan, that use to be my dad’s. I don’t remember many details like the brand or what exactly was wrong with it. I do remember pretending to wail on it at the age of four or five while I left the NES to play the Battletoads theme on a loop as I jumped from the couch, smacking my fingers against rusted strings, probably doing my best Paul Stanley impression.
I wish I could say that was the moment where I realized I wanted to play guitar and learned to play on that beat up, sunburst electric, but I was just a kid playing around on a late summer morning.
I bring it up because it was my earliest touch point with guitar and I believe on some subconscious level it planted a seed for my love of junky, weird old guitars. At the least, it’s an early memory I have of loving something that most would consider junk. I won’t go on about my “obscure” tastes because they really aren’t that obscure, but I do love old crap and I have always like to do things my own way, often the wrong way.
So, inevitably my love of junky old things would lead me to a pretty major restoration project. As you have guessed, I did eventually learn to play the guitar. My first was an Epiphone classical acoustic and my second was a very low-grade Epiphone Les Paul, Jr, so I developed a vague sort-of brand loyalty, despite not knowing much about guitar construction and history until a lot more recently. I was always intrigued when guitarists in bands I liked played guitars with the same name on their head stock, which, even in Punk wasn’t that often. It was like stars aligned when I fell in love with a little known Post-Hardcore band called Frodus, you can read more about my love for that band here.
As a college sophomore I decided to email their front man Shelby Cinca to ask him some nerdy questions about gear, and in particular I was curious about his oddball Epiphone. To my surprise–and total fanboy glee–he responded quickly and clued me in, somewhat erroneously that the guitar he had been playing since the 90s was an Epiphone Wilshire. He was, of course, partially right, as that one piece of information got me researching these guitars. The Wilshire was a mid-level model released by Epiphone in the 60s along with the similar Crestwood, Coronet and Olympic; as well as a series of basses with the same body design. In the 70s, production of Epiphone guitars were transitioned to Japan to save money. True; quality control wasn’t great, the electronic components weren’t the best, the pickup design and elements were below their previous standard, but the hands at the Matsumoku factory(now legendary, go figure) were very capable of manufacturing excellent, if a bit more rugged guitars. The 70s lines also shifted from the fancy sounding names towards basic letter-number specifications that guitar nerds today still can’t get right; you’re just as likely to see an ET-290 called a Crestwood.
A few years ago, I got serious looking for any guitar in this body style. I knew the 60s guitars would likely be out of my price range for the rest of my life, which was fine with me. Why spend so much on a guitar that you will rarely play for fear of accidents or theft? The current production Wilshires and Crestwoods looked decent, but like any current Epiphone they would require some upgrades. Still, I held out hope I could find a nice 70s ET-275, 278 or 290. Then one fateful Sunday morning, while browsing through Ebay I stumbled across a soon to be ending auction on the husk of an ET-278. Within a week, it was sitting in my apartment. I strung it up to get a feel for it and began to make plans. Then it sat.

I learned pretty early on that, unless it’s Fender or a Les Paul, there’s almost no ready fit replacement parts for guitars from this era, and this guitar was missing a lot of them. I scoured the internet for a pickguard that someone may have parted out from another project guitar or even just an outline that I could send off to one of the various companies online that will cut a replacement guard for you. My lack of confidence in my ability to cut a new guard myself and indecision over other aspects stalled this project for over a year.
Other than the pickguard–which I’ll get to later on–I had a lot of other parts to order and the nearly limitless options for replacement pickups had me scratching my head. Guitar playing friends were suggesting pairs of roaring P90s or vintagey mini-humbuckers. I thought, considering the storied history of this guitar design and my own desire for versatility I ought to split the difference. I looked into the difference between humbuckers and their mini-counterparts, Firebird mini-humbuckers, blade style pickups and on and on. I watched Youtube demos of so many different designs and scratched my head at all the forum arguments and the nebulous use of adjectives; punchy, raunchy, squawky, creamy, biting, etc. The more research I did, the more confused I was. Should I coil split humbuckers to have access to even more tone options? The only things I knew for certain was that I didn’t want active pickups or to have to do any routing to the body to make anything fit.
Then it occurred to me. I’d been inspired by one musical hero to hunt for this particular guitar, why not look to another to round out my tonal inspiration? Working my bank operations job meant I had 8+ hours a day to listen to music. I explored genres I wasn’t familiar with, but often out of frustration at my work I would fall back on old favorites like Frodus, Fugazi, Bear Vs. Shark and Hot Snakes. It was the latter that clicked for me. I loved Hot Snakes, Drive Like Jehu and The Night Marchers. I had also really begun to dig into Rocket From the Crypt and was perpetually blown away by the aggressive but three-dimensional quality of John Reis’ guitar playing. With a little bit of googling, I was looking at an old thread on a messageboard where the Swami himself was answering questions about amps and guitars he had used over the years.
His setup is needlessly complicated(he says so himself), involving neck and bridge pickups individually wired to separate output jacks running through two separate amps to pull off two totally different guitar sounds at the same time without any bleed or hum. The clear take away for me was his use of a humbucker sized P90 pickup in the bridge position and an old DeArmond “Gold Foil” ripped from a 60s, Japanese made guitar. This was a revelation to me. I started digging through other forums and watching videos of these odd, microphonic kitschy pickups. The bridge pickup was easy enough. I found the same Rio Grande “Fat Bastard” pickup on Ebay for exactly how much I’d want to pay for it. The gold foil set me back though. Originals would be expensive and likely noisier than I could stand, they also were often top mounted or simply the wrong dimensions to fit in the existing route. Faithful, humbucker-sized reproductions would cost almost as much. I put a pin in that and started looking into the rest of the project.
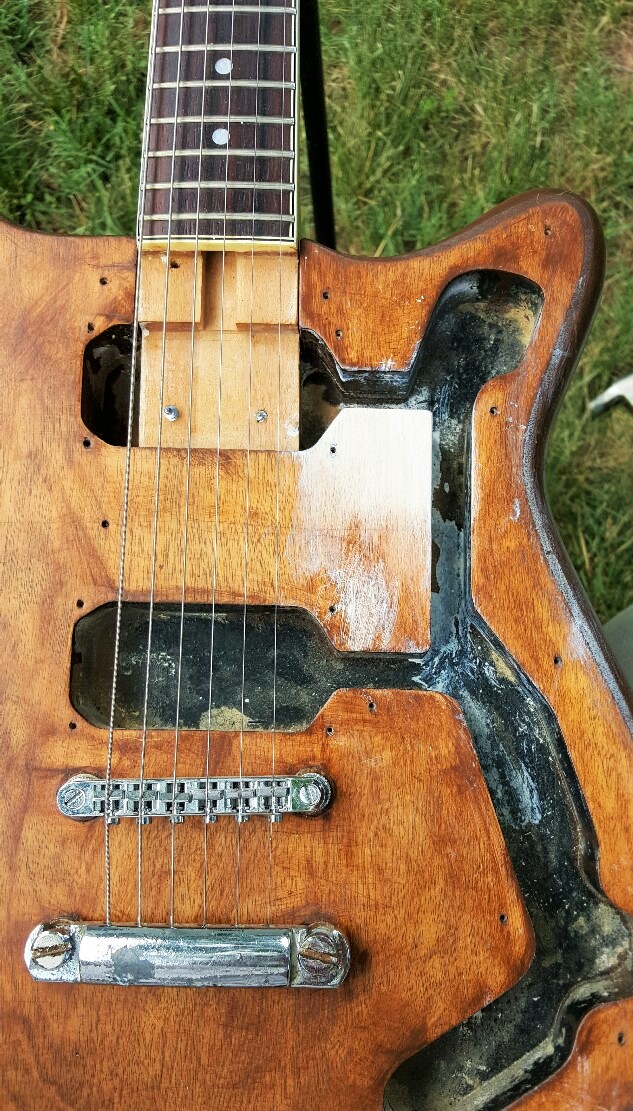
The previous owner had taken it upon himself to refinish the guitar with a dark stain, but it didn’t look great and I wasn’t digging the overall vibe. I decided I wanted to try something a little different for the finish. A word of advice, pick a nice solid color for your first attempt at a guitar finish. After stripping it down to bare wood I took a can of flat white wall paint that we had leftover from a paint job I had done on a pair of dressers, thinking that I could dilute it with water to create a nice translucent white that I could gently wipe on with a sponge or a rag. I was led to believe this would work by some DIY blogger who had refinished wooden shutters with a translucent green paint. This approach didn’t work out for me at all. I wound up with splotches of cloudy white where the paint would stick and unpainted wood or solid white in other places. The grain was too faint and overall the guitar looked worse than before. I sanded again and attempted to do a light coat of white spray paint and got marginally better results, but it was streaky and cloudy still. After a little more reading I learned about wood filler to darken the grain, but by then, I felt I should just pick a solid color and move on because what I was attempting was reportedly difficult to do with diluted nitro based paint and an airbrush.

Stripped back down to raw
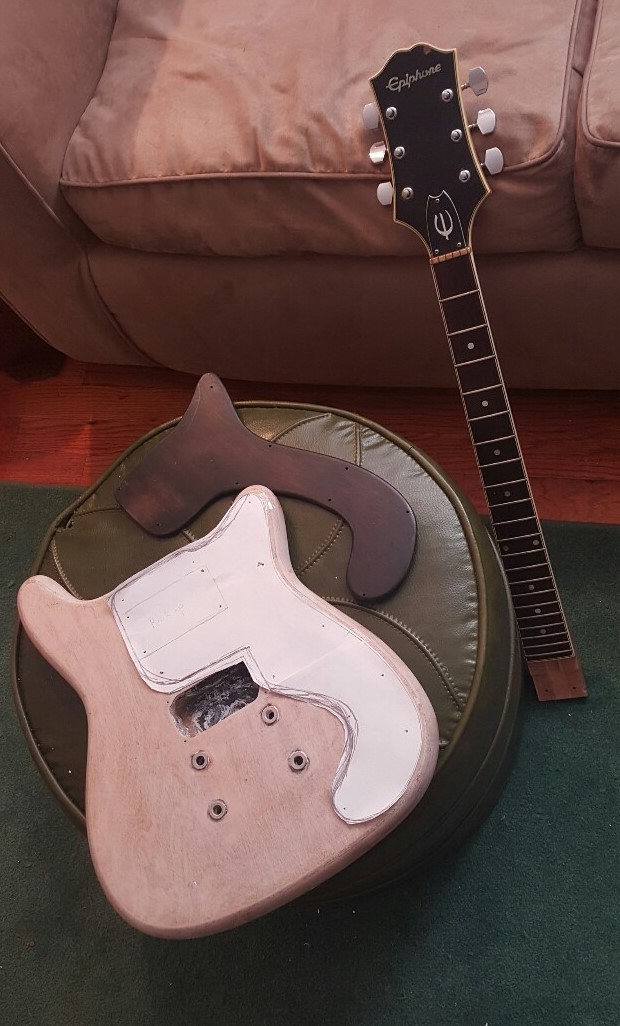
My attempts at refinishing the body scuttled my morale and I left the guitar in pieces in our spare room for months. Earlier this year I decided I had waffled on this guitar for too long. It was time to make some decisions on color and a neck pickup and tackle the pickguard myself. I found one hand cut wooden pickguard on Ebay that someone had made for a Wilshire, but it left a gap, covered the neck pickup position and the screw holes didn’t match up. I attempted to trace out a pickguard on taped together printer paper but didn’t think my outline was close enough. I was also unsure if I could cut pickguard material with the tools I had access to, so I looked for alternatives like wood veneer or some sheet of cheap plastic.
In the meantime, I set about selecting a color. I had ignored the advice of friends too much throughout this project, so I decided to get some input. I wanted to tie this guitar a little closer to the 60s forefathers, so I looked up examples of my four favorite classic Epiphone catalog colors: Iverness Green, Pacific Blue, California Coral and Sunset Yellow. I was personally leaning towards green but the majority votes were for blue. The shades offered by the local Ace Hardware were all too dark or too light for my taste. Before I headed out to start shopping I thought I better decide on a fairly specific shade of blue. I didn’t care for the metallic or primary shades typically used on guitars, but then it struck me. That electric cyan on the cover of a record I’d just seen played by Bruce Springsteen a few months earlier. The River has had a little mythology attached to it by the Boss on his recent anniversary tour, but it did signal major changes for his songwriting and the 1980 tour was a major watershed for him and the E Street Band. It also holds personal significance for me as the point in my own exploration of Springsteen’s catalog some years earlier; when I shifted from an appreciator to a fan. It runs the full gamut of fun, anthemic and moody. I couldn’t be happier that my first Springsteen performance included the entirety of this record when a normal set list could have easily left out personal favorite like “Jackson Cage” or underrated party songs like “Sherry Darling” or any of the darker ballads–like “Wreck on the Highway” or “Stolen Car”–that close out the record. I thought, why not let this guitar–a major project for me–double as a reminder of such an incredibly transformational experience? Also, tying this together, Bruce’s first guitar was supposedly a pawn shop Wilshire.
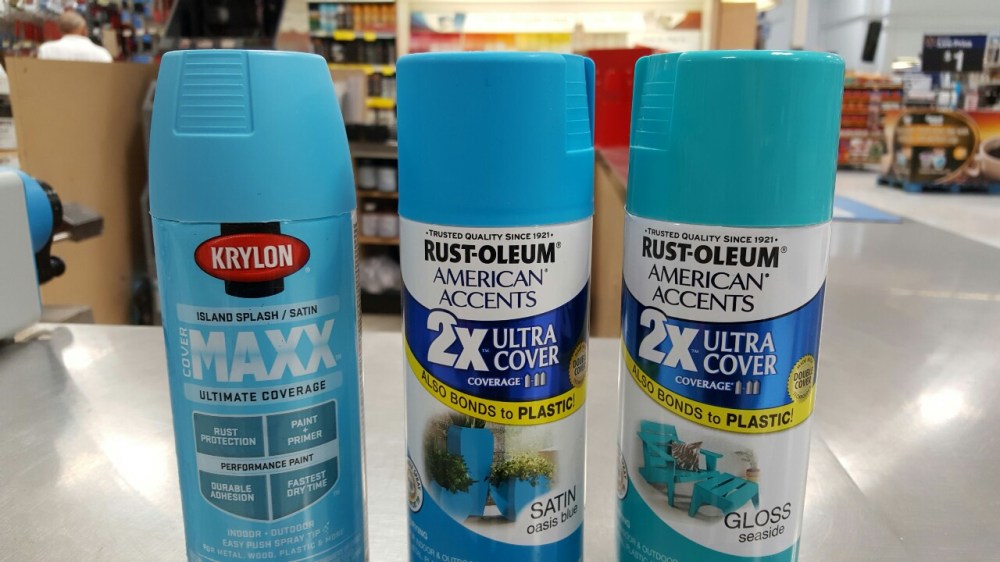
I settled on the Krylon “Island Splash / Satin” on the left
Once I had picked out the perfect River blue I had only to order up the rest of the parts I would need to complete this guitar and set to work on a pickguard. I figured I would go for the cheapest “gold foil” I could find and upgrade it down the line if I didn’t care for it. That led me to GFS, but while perusing their pickups I came across their “Surf 90” which looked even more promising and the demo videos made these pickups seem a little livelier, but before I committed fully I thought I’d do one more pass through Ebay and Reverb for any interesting pickup I hadn’t previously considered. That’s when I stumbled over the last piece of the puzzle. I decided at last on a Univox Hi-Flyer style humbucker from a line of Eastwood reproductions of those guitars. These reproductions were based on a line of cheap old Univox guitars, which were themselves a knockoff of the Moserite Ventures model guitars which were the signature guitar of Johnny Ramone. Perfect, the guitar that helped shape the sound of Punk, but could split the difference and clean up nicely to pull off Surf and Country-ish tones.

After my earlier mistakes finishing the guitar I took my time on the new finish. I spent several days applying color and clear coat. I used an old untwisted coat hanger to hang the body from the clothesline in the courtyard behind our apartment. I took my time, waiting an hour or a full day between coats. I watched the temperature and the humidity. I earned a compliment on the color from a neighbor as he passed by. It’s still not perfect mind you, but unless you got up close you wouldn’t be able to tell.
 My visits to every hardware and general store in the area did turn up a two pack of chopping mats at the Dollar Tree down the street from me. These mats were just translucent and flexible enough to make shaping a template a breeze. I taped a sheet of it down to the body of the guitar, traced an outline with a dry erase marker, noted the screw holes and used my recently ordered pickup rings to get a sense of where to cut the pickup openings. I knew I wasn’t going to do a great job on my first try but a sheet of 3-play white and black pickguard material was cheap enough and I could get at least two tries out of one.
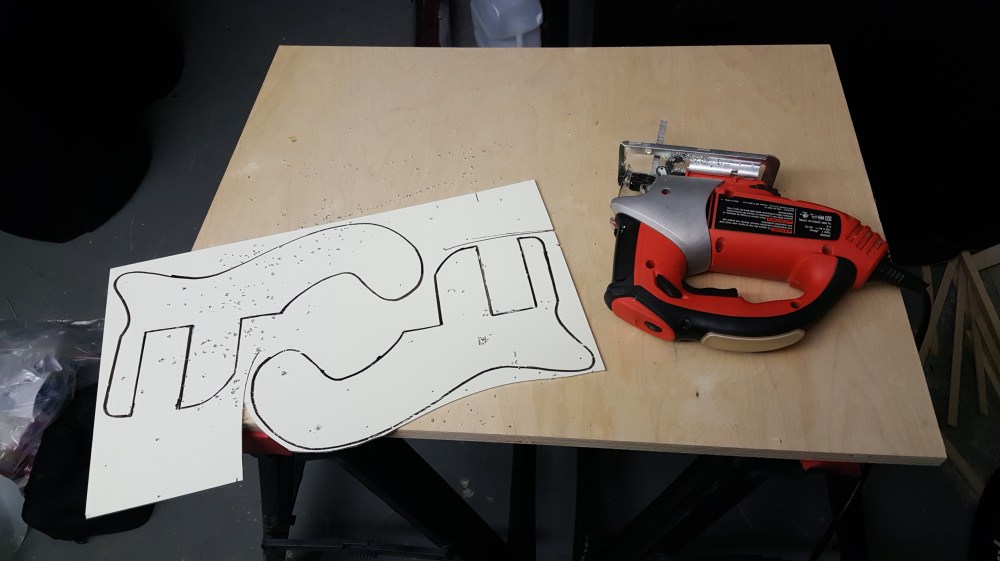
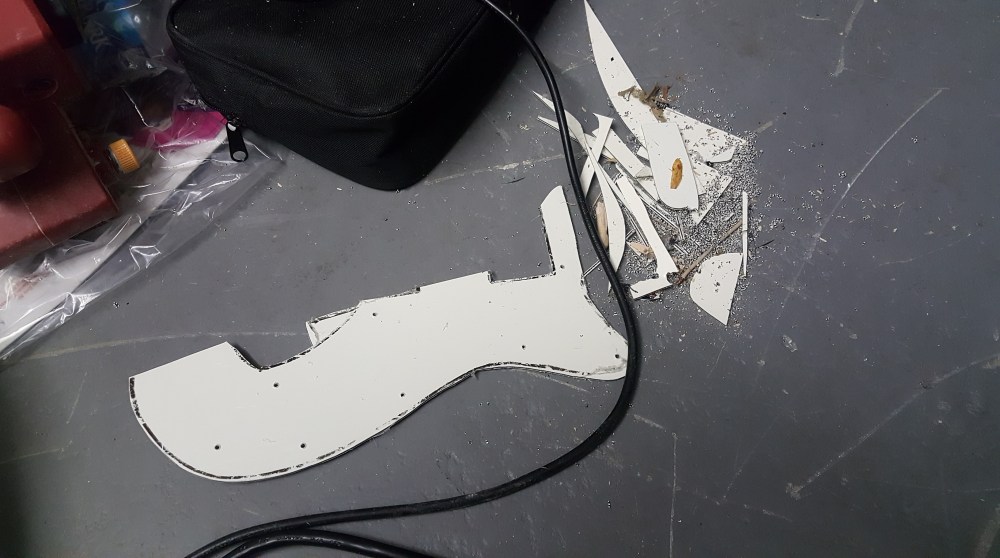
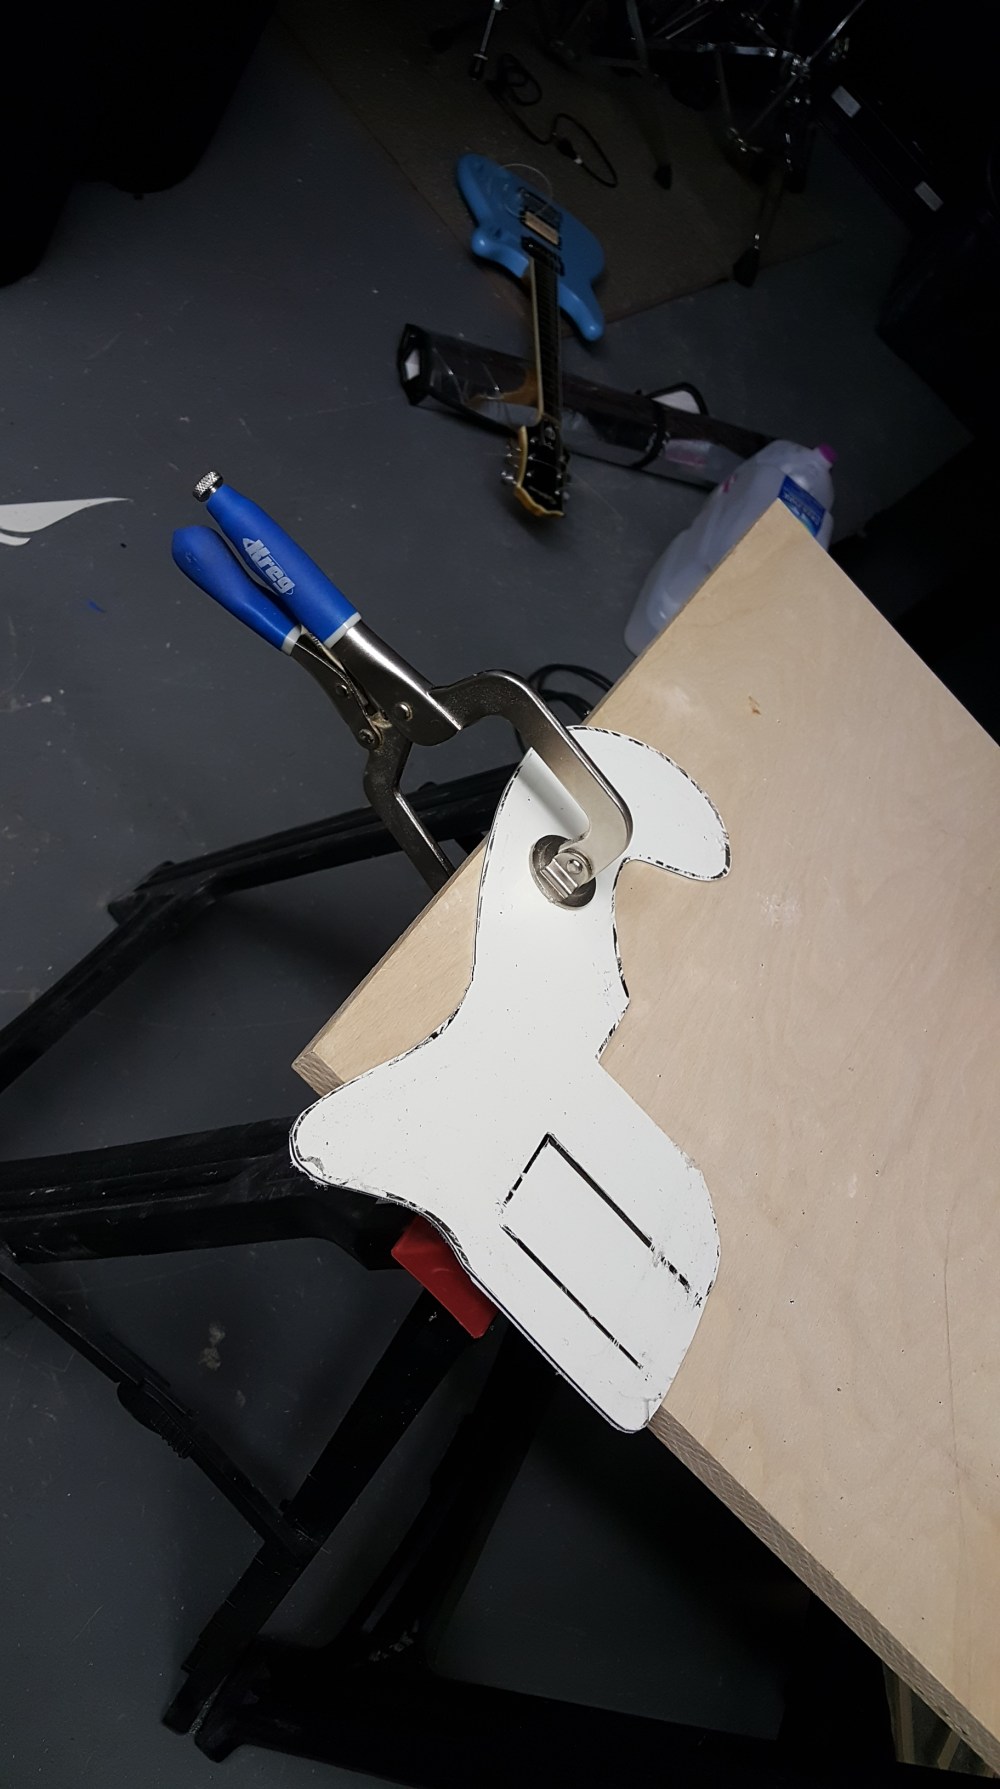 I set about cutting the pickguard by tracing the outline of my chopping mat template onto the pickguard material, clamping the guard onto a makeshift work bench of a piece of plywood over two saw horses and cutting with jigsaw. I had read that if you weren’t careful saws and routers would melt the plastic the pickguard is made out of and cause warping, but I didn’t run into that issue. It took some getting use to, but I found I could cut pretty close to my outline but ultimately I knew I would need to sand it into shape once I was through rough cutting. I got 90% of the way through cutting when disaster struck. Not thinking, I went ahead and cut out the opening for the neck pickup, which left a small, fragile strip of pickguard at the top that still needed a little shaping. Sure enough, this piece snapped right off. On my second attempt, I cut out the bulk of the shape and got it pretty close to being fully shaped before I cut that pickup opening.
With the pickups screwed into place on the guitar I could then test the dimensions of the opening and cut and sand as needed until the guard slid into place. This meant however that due to the slight finagling it took to get the guard into a shape that would fit that my screw hole markings didn’t line up with the actual holes in the body. The only solution was to just drill new holes. By this point I figured, who cares? My only regret was that I didn’t fill the old holes with toothpicks before finishing the body like I had done for the pickup rings. There was no turning back at this point for me. Counter sinking the screws proved challenging and I inevitably stripped multiple screws in the process, which sent me back out to the hardware store.

Seeing that my screw holes wouldn’t match up I knew that meant my markings for volume and tone pots, three way switch and output jack weren’t going to line up. Probably the biggest downside to this guitar’s design is the ridiculously tight channel in the body for all the electronic components. There’s no room for error, so I had to make sure that my openings were exact; off by just a hair and the pots wouldn’t fit in the body. To solve that problem I placed the electronics in their respective places in the body and then marked their tops with a dry erase marker and lined up the pickguard as precisely as possible and lowered it into position so that the posts touched the bottom of the guard and transferred the ink. There is probably an easier or at least more assured approach to marking drill holes, but I couldn’t think of one in the moment and my lo-fi approach had been working so far.
Well, to a point that is. My general phobia and ineptitude with power tools resulted in multiple stripped screws, some rough scratches in the pickguard and even one screw head was snapped off. I thought I was finally ready to wrap up out at the storage unit where I was doing a bulk of the work when I noticed that that strings wouldn’t clear the top of the neck pickup and I couldn’t adjust the height any lower. The Hi-Flyer pickup’s metal beauty ring and pole pieces were pressed right up against the neck which extends into the body a few inches thanks to the double-cut away necessitating a tongue and groove construction that allows for full access of the fret board. There would be no routing of the neck to make room, so I hoped if I just cut off a little bit of the threaded end of the pole pieces it would give me enough room to let the strings pass cleanly over the pickups. No luck. The shiny chrome beauty ring that surrounds the pickup’s coils extends just a centimeter too far. Obviously, I could have just gone with a different pickup, but that would mean delaying this project even more. I was determine to make it work, so with a hack saw and some elbow grease I cut away what I could to drop the pickup just a smidge lower. Sucess! Now the strings could ring freely and I wouldn’t need to raise the action to unplayable heights.
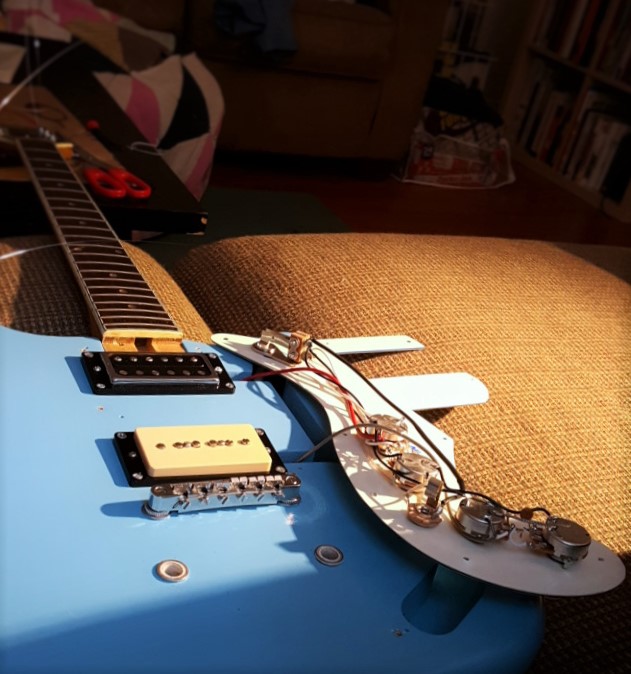
I also struggled when it came to soldering. I’ve never been good at it in the past and my own soldering iron wouldn’t warm up at all, prompting me to borrow a marginally better soldering pencil. By the time I got to work on this last portion I was pretty mad and was working fast, so I didn’t make the smartest wiring route and it took some finagling to get my rats nest of wires positioned in the body in such a way that the guard could be screwed into place.
Now, either my wiring schematic was just wrong or I made a mistake along the way but either way, the tone pot for the bridge position pickup does nothing and I have some issues with volume between pickups in the middle and neck positions. I also was not able to successfully connect a ground wire to the bridge posts correctly due to the low amperage of my soldering iron. I’m currently working around the noise caused by a lack of grounding by running a wire under the pickguard from a pot to the bridge until I muster the courage to pull it apart again and wire it properly. All those issues aside, it was a relief and a rush at the same time hearing that first twang of a major chord. I had made the thing work.

The “Fat Bastard” is every bit as snotty as I was promised, but cleaned up in the bridge position it has a nice, balanced steel string acoustic sound. The Hi-Flyer splutters nicely through heavy distortion, giving sustained notes an especially ragged, pants flapping sound and though it is darker–it is a humbucker–I don’t have any issues picking out individual notes; there’s not much of that typical mud that comes from a humbucker and this “24.75 scale length. Cleaned up chords sound sweet, but slightly dull at the top end, without quite as much jangle as I would like in just the neck position. Individual notes in the neck or middle position have a wonderfully plucky attack that a compressor brings out even more.
Overall, it’s perfect for the twangy, country-ish sounds I have been exploring lately and distorted it has a tightly focused and articulate mid-range while the high-end is slightly rolled off in the neck and middle positions as expected, though that could just as likely be caused by my wiring. Though the original was intended as a Strat competitor, I’ve found a pickup combination that puts this guitar more in Telecaster territory than I expected, with a hot bridge and a pleasant neck, while still retaining those characteristics of a Gibson style guitar. Compared to my Les Paul Jr. this guitar is a little neck heavy, but not so bad as to dive like an SG. Perhaps, not surprisingly the neck rests in a balanced perpendicular position more like a Fender than the “proper” classical guitar angle that I’m use to. The neck is also narrower, which can make it harder getting all your fingers on the fret board properly, but I’ve found it’s easier to make power chords and a fair number of bar chords this way. I’ve had no problems with tuning stability and I haven’t needed to make any adjustments to the intonation yet. It’s weird, a little rough around the edges, but it fits me like an old pair of shoes.
While I was in the thick of it, I thought maybe I’d had my fill at luthiery, but I’m already piecing other projects together in my head. All told, this was a challenging, enlightening and ultimately encouraging project. You can bet I’ll have another machine to tinker with sooner than later. When I do I’ll fill you in.

Hi, I enjoyed the article. I am working on a similar project (ET-275) did you have any problems with the mounting depth of the neck pickup. The neck joint in my ET-275 leaves very little room for adjusting the humbucker depth. The strings touch the pickup when fretting above the 14th fret even when depth adjustment is bottomed out. Any inside about pickup dimensions or faking the fit would be helpful.
Oof. Did I?
I realized this as I was trying to fit the Eastwood hiflier pickup in. I’m not sure off the top of my head what the exact depth is, but I ended up taking a hack saw to the pickup cover on the back side of the pup in order to shorten it, it just barely fit and honestly I don’t recommend this approach.
The only thing I can recommend is finding original pickups and maybe have them rewound to taste if you don’t care for them stock(I have a set in another ET and the neck is just a little murky, but the bridge is just right). Other than that, I would just try too find another neck pickup that fits.
The way the neck tongue extends into the body, I wouldn’t recommend routing it any deeper. They aren’t the most stable necks, and I would really hesitate to take any more mass out of the wood.
Good luck. I’ve got this guitar in pieces again and thinking about reconfiguring it, maybe I ought to do a follow up article. Love the feel of these guitars.